Laying sod can be an excellent way to transform your lawn quickly, providing an instant boost of lush greenery to your outdoor space. Whether you’re a seasoned gardener or a novice, following a step-by-step guide can ensure a successful sod installation. In this comprehensive article, we’ll delve into each step in detail, empowering you to achieve a vibrant and healthy lawn with minimal effort.
1: Prepare the Soil
Proper soil preparation is the foundation for a successful sod installation. Start by removing any existing vegetation, rocks, and debris from the area. This will create a clean slate for your new sod. Next, use a garden tiller to loosen the soil to a depth of about 4-6 inches. Breaking up compacted soil allows for better root penetration and promotes healthy growth. Take care to remove any weeds or grass roots that may regrow and compete with your new sod.
2: Test the Soil
Understanding your soil’s composition is essential for optimal sod growth. Testing the soil pH and nutrient levels can provide valuable insights into any deficiencies that need to be addressed before laying sod. You can purchase a soil testing kit from your local garden center or extension office. Follow the instructions provided to collect a soil sample and send it for analysis. Based on the results, you may need to amend the soil with lime to adjust the pH or add fertilizer to provide essential nutrients for your sod’s health.
3: Measure and Order Sod
Accurately measuring your lawn’s dimensions is crucial for ordering the right amount of sod. Start by measuring the length and width of the area you plan to sod. Multiply these measurements to calculate the total square footage. It’s also wise to add a 5-10% buffer to account for any irregularities or mistakes during installation. Once you have your measurements, place an order with a reputable sod supplier in your area. Consider factors such as grass type, climate suitability, and delivery logistics when selecting your sod.
4: Prepare the Site
With the soil prepared and sod ordered, it’s time to prepare the site for installation. Begin by grading the soil to ensure proper drainage away from your home’s foundation. Use a rake to smooth out any bumps or uneven areas, creating a level surface for the sod to be laid on. Take care to remove any debris or sharp objects that could damage the sod or hinder its growth. Proper site preparation sets the stage for a successful sod installation and ensures your lawn’s long-term health and beauty.
5: Install Edging
Installing edging along the perimeter of your lawn helps define its boundaries and prevent the sod from creeping into flower beds, sidewalks, or driveways. Choose a durable edging material such as plastic, metal, or concrete, and install it securely around the edges of your lawn using stakes or anchors. Proper edging not only enhances the aesthetics of your lawn but also provides a barrier to protect your sod from encroaching weeds and invasive grasses.
6: Lay the Sod
Now comes the exciting part – laying the sod! Start by laying the first row of sod along a straight edge, such as a driveway or sidewalk. Butt the edges of the sod pieces tightly together, ensuring a seamless fit. Avoid any gaps or overlaps between sod pieces, as they can hinder root establishment and promote weed growth. Use a sharp knife or sod cutter to trim the sod as needed to fit around curves or obstacles. Take care to stagger the joints between sod pieces in each row, similar to laying bricks, to create a cohesive and uniform appearance.
7: Stagger the Joints
To achieve a seamless look and encourage root growth, stagger the joints of the sod in each row. This means that the ends of the sod pieces should not line up with each other but instead overlap like bricks in a wall. Staggering the joints distributes stress evenly across the lawn and prevents visible seams from forming over time. Take care to maintain consistent spacing between sod pieces and ensure they are snugly fitted together to promote optimal root contact with the soil.
8: Water Thoroughly
Proper watering is critical for the initial establishment of sod roots and the long-term health of your lawn. After laying the sod, water it thoroughly to help it settle into the soil and promote root growth. Use a sprinkler or hose to water the sod evenly, making sure to soak it down to the roots. Avoid overwatering, as excessive moisture can lead to root rot and other issues. Monitor soil moisture levels regularly and adjust your watering schedule as needed based on weather conditions and soil drainage.
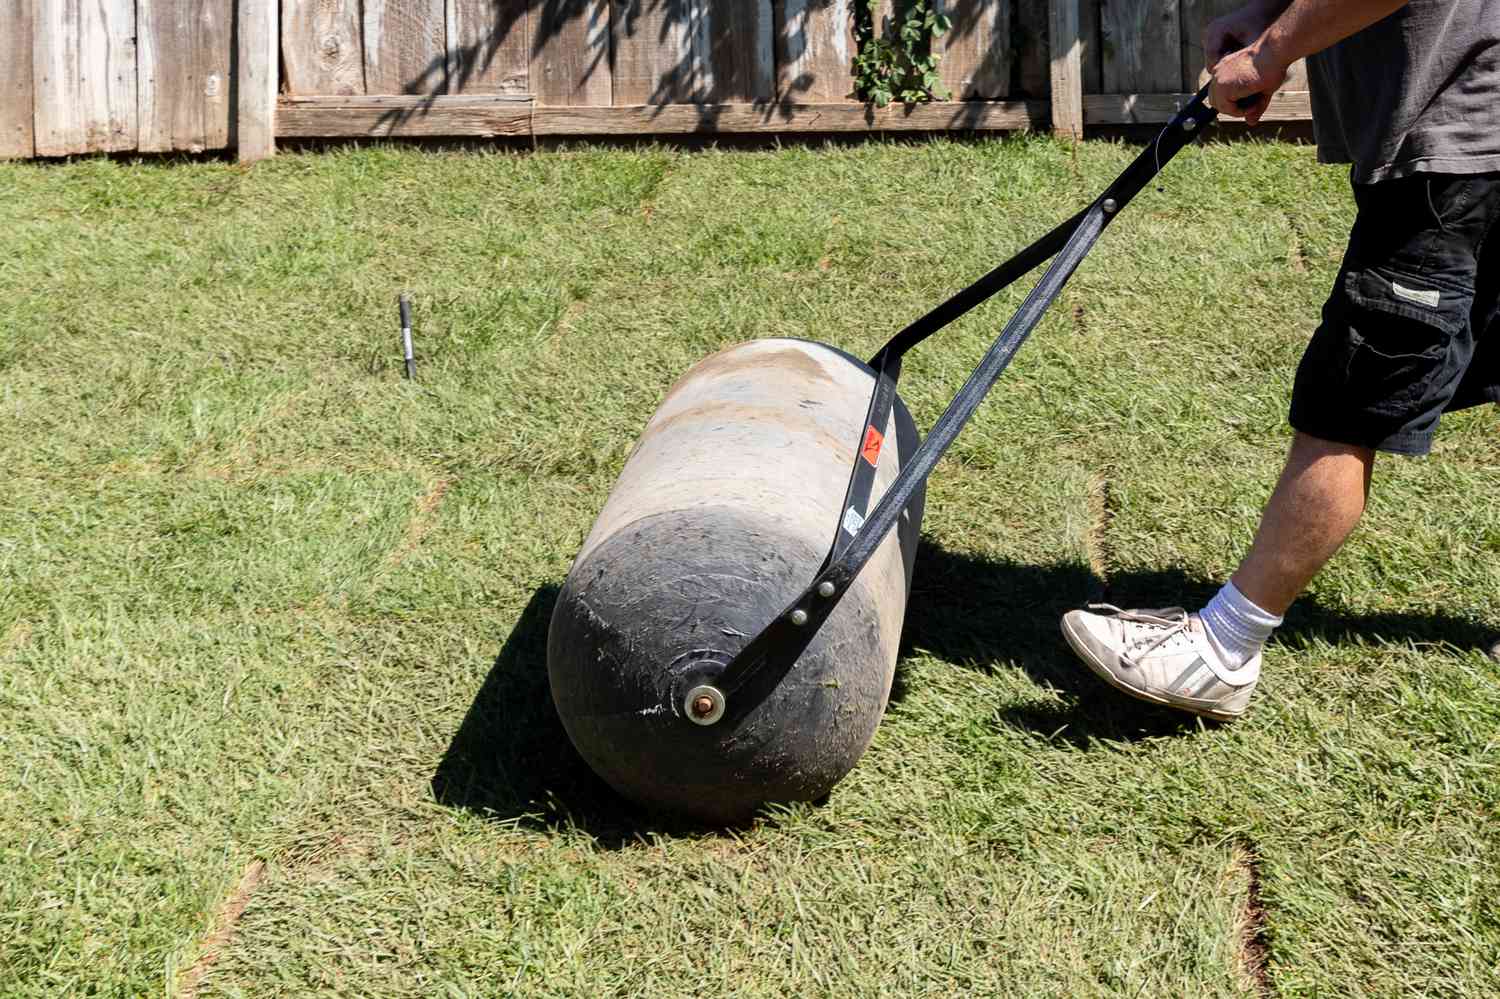
9: Roll the Sod
Once the sod has been watered, use a lawn roller to gently press it into the soil. Rolling helps eliminate air pockets and ensures good contact between the sod and the underlying soil. This promotes root establishment and prevents the sod from drying out or shifting during the initial growth phase. Roll the entire lawn in different directions to achieve a smooth and level surface. Take care not to apply too much pressure, as this can damage the sod or compact the soil excessively.
10: Maintain Proper Care
Proper care and maintenance are essential for the long-term success of your new sod lawn. In the weeks following installation, continue to water the sod regularly to keep it hydrated. Monitor soil moisture levels and adjust your watering schedule as needed based on weather conditions. Avoid walking or mowing on the sod until it has established roots, typically within 2-3 weeks after installation. Once the sod has taken root, gradually resume normal lawn care activities, including mowing, fertilizing, and weed control. Regular maintenance will help keep your sod lawn healthy and vibrant year-round.
Final Thoughts
Laying sod may seem like a daunting task, but with proper preparation and guidance, it can be a rewarding and relatively straightforward project. By following these 10 easy steps in detail, you can transform your outdoor space into a lush and vibrant lawn that you’ll enjoy for years to come. So roll up your sleeves, grab some sod, and get ready to enjoy the beauty of a freshly laid lawn!